Did you know you can make solar panel cells at home and save ,000's off regular retail pricing? Honestly, it's so easy almost anyone can do it, even if you don't have any solar experience. There are now easy-to-follow guides that walk you through step--by--step to show you how to precisely make your own...and for less than 0!
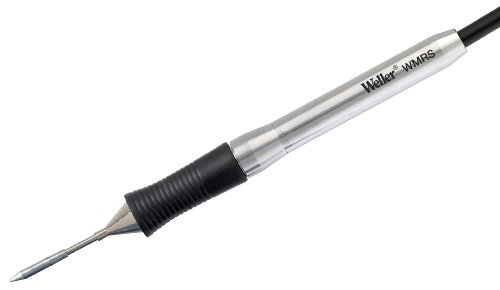
Micro Soldering Iron
Why would you spend thousands of dollars when you can spend just a fraction of the retail cost?
Micro Soldering Iron
The really great thing is you have the potential to eliminate your electricity bill and just rely on the sun for your source of energy. This can literally save you thousands of dollars in electricity bills. If you are considering professional installation then it could literally save you tens of thousands of dollars in installation costs as well.
You may be thinking "making solar panel cells is expensive and difficult"? I thought the exact same things, but things changed very quickly for me after I did just a little research. This is why I'm writing this article, I want to help you as well and do my part to help make the world a little bit better place.
A few years ago I started looking into solar energy. I started looking on the web, doing online searches to learn how I could save money with solar electricity. I was shocked to see how much it cost to have solar panel cells professionally installed. The estimates I received were anywhere from ,000 to ,000. The time it would take to recover my money was way too long and I couldn't really afford to spend that kind of money. It just didn't seem like a feasible project for me.
About a week later, a friend and I met for a beer, and we started talking about solar energy and he said he had just added solar panel cells at his home, and had done it himself. He said he looked at a lot of different drawings and designs, but nothing was very organized. He went on to tell me how he finally went online and stumbled across a DIY guide that gave him good step-by-step details on how to do it.
That is why I'm here, writing this article, because I did the same thing, I researched online and used the same DIY guide. I went online the next day and found it. Just like he said, it takes you step--by--step through the process of making your own solar panel cells at home. Anyone can do it, even if you aren't the handyman type. The really cool thing is the guide even has video clips to help you visualize the exact steps involved.
I learned the step-by-step process of creating a solar panel, and how and where to install it. I also learned how to maintain them, which is just as important. I was really surprised at how easy it was to wire everything together. It was cool to also learn how the energy that is captured is stored too. It's a pretty awesome project and it's shocking how many people still haven't grasped the potential. If you have kids, you can get them involved and make it a family project too.
You can make a single solar panel or a full array of solar panels with hundreds of cells. You can save significant money off of your electricity bills and do it in a short amount of time quickly and easily. If you are like me, and you enjoy working with your hands and creating things, then I highly recommend giving it a try. It only requires basic tools and supplies. You can get most everything you need at a local hardware store. The basic items you would need would be wood or aluminum framing material, screws, glue, wire, clear plastic sheeting, the solar cells themselves, and some other basic tools to put everything together and then install the panels.
Here is a list of some of the items you will need:
Volt Meter
Saw
Drill
Plywood
Paint brush
Screwdriver
Rosin Flux Pen
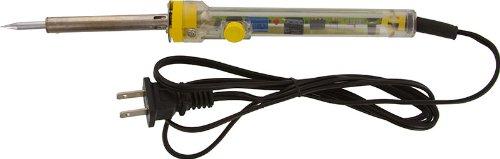
Soldering iron gun
Wire cutters
Caulking gun
Plexiglass cutters
Plexiglass
Tin Wire
Solder
Micro-crystal Solar Panel Cells (only about or each)
Silicon caulk
UV-Protective varnish
It usually takes about 80 solar cells to generate 100 watts of power and you will test each cell to see how many watts it generates with your volt meter. The most common solar panel shapes are rectangular so once you determine how many cells you want or need then you just cut the plywood to match the size you need, but you can make the solar panels any shape you like.
Once you have the plywood cut you can apply the UV-Protective varnish. While the varnish is drying you can move to the next step and start working on the solar cells themselves.
I would start by using the Rosin flux pen to apply the flux to the bus strips on the solar panel cells. This is to make sure that when you solder the ribbons to the solar panel cells that they will stick completely, and also so that your wiring will connect correctly. Then the next step is to connect the actual solar panel cells to each other. You will only need to apply a little silicon to attach them to the plywood once you have them all connected.
In the next steps you should have two unattached wires hanging from the connected solar cells. So you will now drill two holes in the plywood and feed the wires through the holes. To keep water out you just fill in the holes with silicon.
The next step is building the frame for your panel to hold the Plexiglas in. So you just screw the frame to the plywood and cover all the screws and gaps with silicon to make sure it's all waterproof. The Plexiglas will then need to be attached to the frame with silicon first and then followed up with screws. You'll want to make sure to pre-drill the screw holes in the Plexiglas prior to attaching it to the frame you built to prevent any cracks from developing.
You will want to make sure every single gap is sealed in the panel to make sure no moisture gets in with one exception. Once all the gaps are sealed, moisture will still build up in the panel over time so you will need to provide a small hole at the bottom of the panel, away from all the wiring though, to allow for air to get in and keep the moisture from building up. It's placed at the bottom of the panel so that rain won't get inside and run all over your wiring.
That's about it, other than installation. It's really very simple when you break everything down. So if you've been giving some thought to trying to build your own solar panels then you should stop stressing about the cost to have them professionally installed, stop stressing about your high electricity bills and start thinking about how much more fun it will be to make them yourself, forget about the worry of high electricity bills once and for all and learn how to make your own solar panel cells at home too! I did it and you can do it too.
Make Solar Panel Cells At Home And Save Thousands Of Dollars
Micro Soldering Iron

Click for larger image and other views
>> Click here to update Cheapest prices for Blazer SI-100 Excalibur Multi-Purpose Butane Torch and Hot Air Soldering Kit <<
Blazer SI-100 Excalibur Multi-Purpose Butane Torch and Hot Air Soldering Kit Feature
- Multi-purpose tool kit, for soldering, hot air blowing, and torch needs
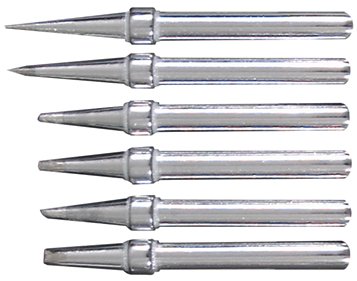
- Five interchangeable tips, for a variety of applications
- Self-igniting, cordless, anti-flare soldering iron, for ease of use
- Piezoelectric ignition system, requires no electrical connection
- Child-resistant mechanism at trigger, for safety
Blazer SI-100 Excalibur Multi-Purpose Butane Torch and Hot Air Soldering Kit Overview
The Blazer SI-100 Excalibur, multi-purpose, butane torch and hot air soldering kit is a tool kit that provides tools for soldering, hot air blowing and torch flame needs. The torch creates a precise flame emitting from a nozzle head, allowing direct heat application to an object. It is commonly used for detailed purposes such as brazing, plumbing, soldering, heating, jewelry making, and culinary, dental, and lab applications. Tools within the kit are also used for electronic, automotive, woodworking, lapidary, and general maintenance.
The SI-100 is a multi-purpose tool kit, providing a self-igniting and cordless soldering iron, hot air blower and refillable butane gas torch. The set includes five, interchangeable tip choices: reflector, hot air blower, knife, one 3.5-millimeter chisel and one 3.0-millimeter diagonal. It also comes with a wrench, sponge, and one tube of 60/40 coiled silver tube of solder. The torch features a child-resistant mechanism, and an instant ignition switch.
The torch houses a piezoelectric ignition system, which is based on a pressurized molecular reaction, and requires no electric connection. Piezoelectric energy occurs when the trigger is activated, releasing a small, spring-loaded internal hammer that strikes a crystal, producing a spark and resulting in gas flame ignition.
With a maximum flame temperature of 2,500 degrees F, the torch has a 7.0-gram gas capacity, weighs 4.9 ounces and is 9.0 (l) inches. The case measures 10.25 (l) x 4.38 (w) x 1.5 (h) inches. This product is intended strictly for use in professional and industrial environments. In accordance with federal regulations, home use of this product is prohibited.
Since 1985, Blazer Products has created an array of professional and industrial tools and equipment. Located in Farmingdale, NY, the company manufactures a variety of torches and ultrasonic cleaners. Blazer Products is known worldwide for its original micro torch products.
The SI-100 kit comes in a hard shell carrying case, and the torch operates with a standard butane canister (sold separately).
SAVE NOW on the special offers below!
Available In Stock. |
| This Blazer SI-100 Excalibur Multi-Purpose Butane Torch and Hot Air Soldering Kit ships for FREE with Super Saver Shipping. |
|

Order Now Blazer SI-100 Excalibur Multi-Purpose Butane Torch and Hot Air Soldering Kit Best Price at Amazon.com